7-Point Checklist: Inspecting a Bosch E-Bike Drive System Before You Accept It
· Elena Markovic
-
Who This Checklist Is For
-
Step 1: Verify Model and Build Configuration
-
Step 2: Firmware Version Check
-
Step 3: No-Load Current and Start-Up Behavior
-
Step 4: Torque Sensor Calibration
-
Step 5: Belt Drive Inspection and Timing Belt Noise
-
Step 6: Connectors, Cables, and Fastener Torque
-
Step 7: Thermal Soak Test
-
Notes and Common Mistakes
Who This Checklist Is For
Every drive system I inspect has one mission: to reach a customer who never thinks about it again. My job—and I mean this literally—is to find what's wrong before the customer does.
I'm a quality compliance manager at a drivetrain company. I review roughly 200+ drive units annually: e-bike mid-drive motors, industrial servo motors, linear stepper motors, gear drives. I've been doing this since 2019, and I rejected about 9% of first deliveries in 2024 for spec deviations—not typically for catastrophic failures, but for small inconsistencies that turn into field failures later.
This checklist is for anyone accepting a Bosch e-bike drive system: a factory-complete unit, a bosch ebike motor kit for a conversion, or an e-bike with Bosch mid drive already installed. Seven steps, about 45 minutes if you know what you're looking at.
Step 1: Verify Model and Build Configuration
Before you plug anything in, check the type plate. The bosch-ebike drive family is split into distinct platforms—Performance Line, Performance Line CX, Performance Line Speed, Cargo Line, and the older Active Line units. Different torque ratings, different reduction gear ratios, different PIN configurations. The model you ordered needs to match the model you received.
This sounds obvious. You'd be surprised how often motors get mixed up in distribution. Back in 2022, we received a batch of 120 units where eight of them were the wrong regional variant. The vendor blamed the label printer. It still cost us a full re-inspection of the lot.
Step 2: Firmware Version Check
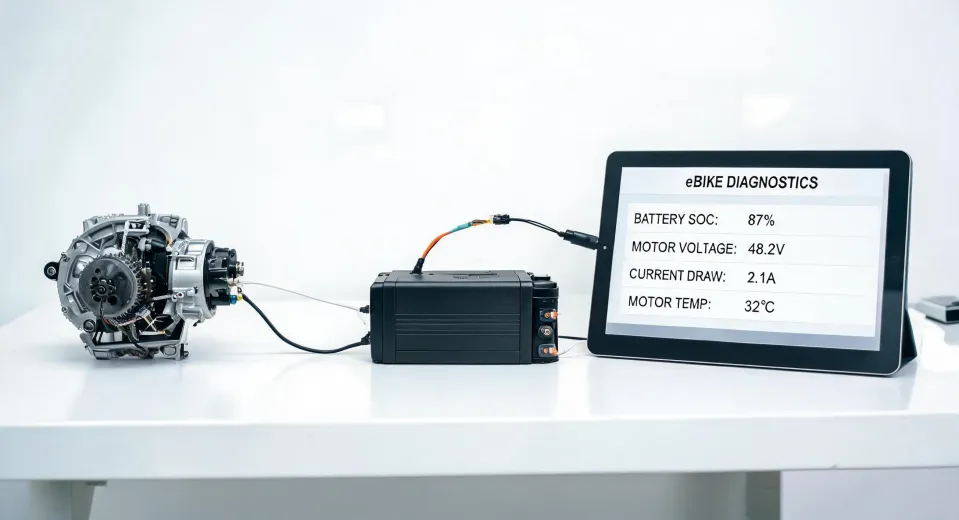
Connect the drive to the Bosch Diagnostics tool and verify the firmware version against your spec. A mismatch here is a red flag even when the unit powers up fine. I've seen drives ship one or two releases behind, no visible symptoms—until the customer hits a known bug that a newer firmware already fixed.
The firmware check takes two minutes. The rework, once installed, takes two hours. Do the two-minute version, on every unit.
Step 3: No-Load Current and Start-Up Behavior
Bench test the motor with the wheel off the ground. Measure no-load current at consistent assist levels and battery state of charge. I won't give you a single amperage number because it varies by model and firmware—what matters is repeatability. Same unit, same conditions: you should get the same readings. If one unit draws 15-20% more than its brother from the same batch, something is dragging. Check the reduction gearbox, then the bearings.
Listen during spin-up and deceleration. Grinding, clicking, or a high-frequency whine above normal motor noise points to a mechanical defect. In our Q1 2024 audit, we rejected 6% of one supplier's first delivery because of abnormal no-load noise. They claimed it was "within industry standard." We held the batch and they redid it at their cost. Now every contract includes a specific noise anomaly clause.
Step 4: Torque Sensor Calibration
This is the step most people skip, and it's a genuine quality trap. E-bike torque sensors drift. All of them, eventually. On a Bosch mid drive, the torque sensor sits in the bottom bracket. If it reads 10-15% high or low, the assist feels wrong: twitchy on low settings, laggy when you push hard. The rider blames the motor. The motor is fine.
Test procedure: mount the crank arm horizontally, apply a known force with a calibrated pedal force gauge (or use the diagnostic tool's live sensor readout), and check that reported torque tracks the applied force within spec. I look for a smooth, linear response from zero to the drive's rated torque. A dead spot at low input is a deal-breaker for acceptance—it makes the bike feel like a light switch, not a torque sensor.
Side note for the industrial side of the shop: linear stepper motors fail the same way. The common acceptance error is checking only step count and direction. That tells you the motor is alive, not that it's accurate. Verify the actual linear force output with a load cell against the commanded value. Step count says "it moved." A load cell says "it's delivering the right force." Different product, same inspection principle.
Step 5: Belt Drive Inspection and Timing Belt Noise
For belt-driven bikes, spend extra time on the drive belt. Timing belt noise is the number-one customer complaint in belt-drive e-bikes—ahead of the motor. Here's what I've learned troubleshooting belt noise (the hard way):
- Whine that changes with speed is usually excessive tension. The belt is tightening the span into resonance. Re-tension to spec and the whine goes away.
- A click once per revolution is either debris embedded in the belt teeth or a damaged tooth. On Gates Carbon Drive, it's usually debris, not damage.
- A squeal under load is a slipping belt—too loose or worn. That's the clearest signal of all.
Check belt tension with the correct tool. Gates specifies tension by frequency (Hz), not by deflection, so you need the Gates tension gauge (or the app with a microphone adapter). And check belt alignment: a rear sprocket with runout makes a constant chirp that sounds exactly like a worn belt. Don't replace the belt. Realign the sprocket. That's a $0 fix versus a $90 belt.
Step 6: Connectors, Cables, and Fastener Torque
The cabling on an e-bike lives in the worst environment on the vehicle—water, grit, vibration, motor heat. I can't count the times I've found a connector with no grease, or a zip tie so tight it's cutting into the wire insulation. (Honestly, I'm not sure why cable routing is still so often done blind. Manufacturers know better, and yet, here we are.)
Check: battery connectors fully seated, torque arm bolts torqued to spec, cable clearance at least 10 mm from the chainring, connectors free of moisture ingress. Finger-tight is not a spec. Use the torque wrench.
Step 7: Thermal Soak Test
Final step, and the one that requires the most setup. If you catch a thermal defect here, you've just avoided a warranty motor replacement.
Run the drive loaded for 15-20 minutes continuously—on a roller or against a brake on a test stand. Monitor housing temperature with an IR thermometer or thermal camera. A Bosch Performance Line CX in a 20°C room settles around 70-80°C after 20 minutes of loaded running. Warm, not hot. If your unit keeps climbing past 100°C, stop and investigate: lubrication quantity, bearing friction, controller current limiting. Do not accept it.
No load bench available? At minimum, run the drive under load briefly, get it warm, and check for thermal derating error codes. A drive that throttles back five minutes into a ride becomes a customer complaint within a week. That check is a no-brainer.
Notes and Common Mistakes
Three mistakes I see most often from our own team and from customers doing acceptance testing:
- Testing one unit per batch. I've seen batches where 1 in 10 has a firmware mismatch and the other nine are clean. If you're accepting 50 units, test more than one. Set a sample rate that matches the risk you're willing to carry.
- Skipping the noise step. It's the cheapest diagnostic in this entire checklist—60 seconds, and it catches more mechanical defects than anything else. Do it every time.
- Not documenting evidence. Take photos, even when the unit passes. One of my biggest regrets: not photographing a batch of misaligned brake mounts in 2023. I had to fight for a credit for four months because I couldn't prove what I'd seen.
One more thing. I occasionally get asked, "What happened to Pete Jackson gear drives?" The name still circulates around the drive-gear crowd. Honestly, I don't have hard data on the company's history—I never worked with them directly. My guess, based on how the specialty gear drive market has shifted, is that it wasn't a single dramatic failure. More likely the application base shrank decade by decade, and tooling and certification costs eventually made the line uneconomical. Or quality slipped and the brand paid for it. This much I know for sure: in this industry, a quality failure doesn't cost you one batch—it eventually costs you the whole line. You rebuild trust one shipment at a time, and you can lose it in one.
Bottom line: the seven steps above do not cover every possible defect in a Bosch e-bike drive. I don't do durability ratings or real-world range validation—that's the design engineer's job, and I'd rather be clear about that boundary than pretend otherwise. What this checklist does is catch the inconsistencies before they become customer complaints. "It worked on the bench" is not acceptance criteria. The unit matches its spec, verified step by step. That's the standard.